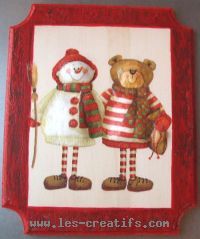
Christmas frames, decorated wooden frames
Here are a number of wooden frames as ideas for Christmas decorations, created using the techniques of embossed napkins, crackle paint, painted salt dough modelling...
Materials
- a moulded rough wooden door plaque, 22 x 18 cm
- a napkin with a Christmas motif suitable for relief
- relief paste
- crackle gel
- fir green and red acrylic paint
- aerosol glue varnish, liquid matt varnish
Highlighting
First, measure and trace the circumference of the frame (to be painted) with a pencil.
Carefully cut out the Christmas napkin motif with small, thin scissors.
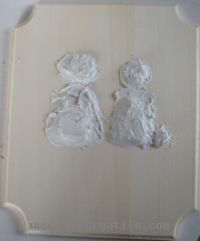
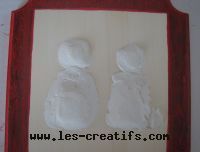
Position this motif and mark the location of the raised areas with a pencil; for our motif, these are the 2 heads, the belly and the little bag.
Using relief paste (a special, air-drying modelling clay) or structure paste (a kind of spatula-applied plaster), form the reliefs in the indicated positions. Once the relief is completely dry, you can sand it with fine paper to make it as smooth as possible, making sure it matches the pattern to be glued.
Using relief paste (a special, air-drying modelling clay) or structure paste (a kind of spatula-applied plaster), form the reliefs in the indicated positions. Once the relief is completely dry, you can sand it with fine paper to make it as smooth as possible, making sure it matches the pattern to be glued.
During this drying time, the frame can be roughly painted in the first color: fir green.
Frame painting
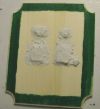
Around the frame, apply the crackling gel (as soon as the first color is dry to the touch), always in the same direction (vertical).
After a few minutes drying time, you can paint with the second color, a beautiful Christmas red, in the same direction and in a single pass. The cracks in the paint should already be visible, and will become more pronounced as the paint dries.
The relief is sanded down, ready for the napkin motif.
Gluing the pattern
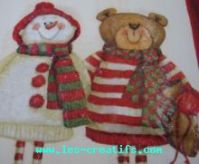
Place the design on the napkin (only the 1st printed layer remains), face down on a clean sheet of paper.
Spray the varnish-glue spray (from a distance of about 20 cm). Wait a few minutes for the adhesive to develop.
Place the motif, starting with the center, in the frame, taking care to position it on the relief.
The use of spray varnish-glue means that the motif can be removed without damage and repositioned several times (which is not possible with the liquid version of varnish-glue): this is essential for this relief napkin technique.
The frame is then varnished in two coats with colorless matte varnish.
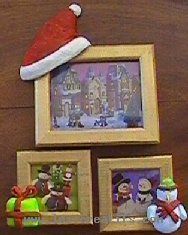
Small picture frames with salt dough decorations
Prepare salt dough (you won't need much for 3 small frames) according to the salt dough recipe.
Remove the glass from the frames and model Christmas motifs on the frames themselves:
Insert photos or cut-outs from Christmas cards, magazines or children's Christmas coloring pages into the frames...
Remove the glass from the frames and model Christmas motifs on the frames themselves:
-
a
- Santa Claus hat on a corner of the frame: model the shape of the hat, add a wide strip representing a white fur, then a ball at the end of the hat
- a Christmas gift: a cube is pressed against the corner of the frame.
- Model a thin, long colombin and place it like a bolduc, making a (false) loop
- a snowman: a large ball for the body (well pressed against the frame), a ball for the head, add the arms then a scarf in two parts (cut the ends of the scarf with fine scissors to make bangs), place a bonnet with the turn in relief and the end of a wooden spade as a nose .
Insert photos or cut-outs from Christmas cards, magazines or children's Christmas coloring pages into the frames...
Where tofind the supplies for this DIY project?
- varnish-glue spray, acrylic paint, small wooden objects and paper towels (store "Fournitures créatives")


