Children's DIY: a cardboard dragon
A complete craft: tracing, cutting, gluing and painting, culminating in an articulated toy.
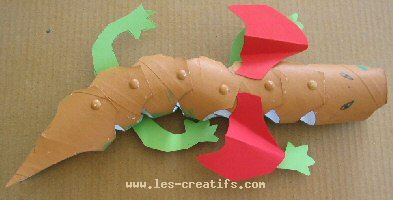
Winged dragon, lizard or snake, it's up to you...
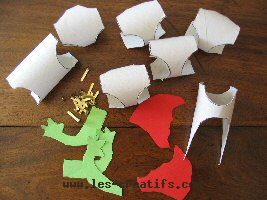
Materials :
- cardboard rolls (paper towels or toilet paper)
- brads
- children's paint
- sheets of thick coloured paper for the legs and wings (unless you want to paint them too)
|
|
Production stages :
 |
Printthe patterns. |
They have been reduced to 25%, so you can print them full-page and leave them to the graphics software, or resize them to +400% before printing.
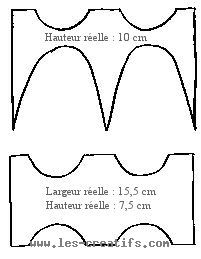
Tail (top) and head (bottom |
|
) |

Dragon body
|
 |
Cut outthe drawings for each pattern.
Transfer the patterns to the cardboard rolls: trace the head once, the tail once and the body 5 to 7 |
times.| Cut out with scissors. |
 |
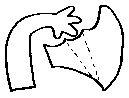
Cutwings and legs from the sheet(s) of thick paper. |
| Mark the folds on the wings with a ruler. |
 |
Paintthe head, body and tail: we've chosen 2 colors to distinguish back and belly. |
 |
Punchthe holes (4 per body block, but only 2 for the head) with a spade-shaped screwdriver, or with a hole punch, placing the cardboard block to be punched in the corner of a table, for example |
.
 |
Assemblethe head, body parts and tail using brads, always overlapping in the same direction. |
 |
Glue onthe legs and wings. Then draw two eyes, naughty or nice, |
as you wish...