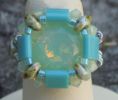
Pearl ring models
Pearl rings, both rocaille and crystal, are made using pearl weaving techniques of varying complexity.
Here's a very simple ring model to make, and we'll show you how it's done.
|
|
[espace-pub-horilarge]
Make your own beaded rings
Threading is done on nylon or brass wire (diameter 0.28 mm): it's up to you to decide which material you're most comfortable with. Note that nylon allows finer tightening but must be held in place, whereas brass wire, which is more difficult to tighten close to the beads, remains in place when tensioned.Faceted pearls, glass beads or Swarovski pearls can be added to seed beads for an even more luminous effect. Once you've mastered the principle of weaving, you can easily create your own pearl ring designs - the variations are endless!
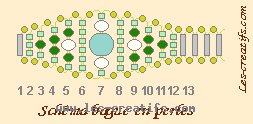
Schematic of a seed bead ring design
 Diagram legend |
 |
At the center of a 1 m length of wire:
Row 1: string one gold bead, one tube bead, one gold bead.
Row 2: string 3 seed beads, pass through these 3 beads with the other wire.
Rang 3: 1 gold bead, 1 seed bead, 1 large green bead, 1 seed bead and 1 gold bead, cross the other thread in this last assembly without taking the gold beads.
Repeatthese operations, using the diagram above as a guide.
Rank 4: 1 gold bead, 1 seed bead, 2 large green beads, 1 seed bead and 1 gold bead.
Rank 5: 1 gold bead, 1 seed bead, 1 large green bead, 1 large white bead, 1 large green bead, 1 seed bead and 1 gold bead
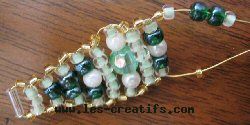 Rank 10 weaving |
Rank 6: 1 gold bead, 6 seed beads, 1 gold bead. Rank 7 (center): 1 golden pearl, 1 seed pearl, 1 white pearl, the center pearl, 1 white pearl, 1 seed pearl, 1 golden pearl. Rank 8: identical to row 6. Rank 9: identical to row 5. Rank 10: identical to row 4. Rank 11: identical to row 3. Rank 12: identical to row 2. |
 |
13 and 14 |
Row 13 : identical to row 1 and repeat this same row until the desired ring diameter is reached. |
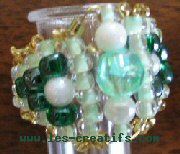
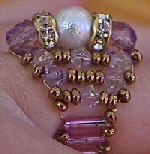
A similar weave for this ring, but with rhinestone beads to frame the central bead and faceted beads to catch the light...
Purists will use Swarovski crystal beads for more play of light and reflections.
Tip You can use a nylon wire lined with a very fine brass wire: the ring will be more rigid and the nylon will not relax during the making of your jewel. |
|
Tolearn how to create more elaborate ring designs, with beautiful Swarovski crystal pearls, follow the instructions in the "Bijoux et perles" boutique.

