
Scrapbooking: templates, examples and a little technique
- Scrapbooking vocabulary
- Embossing technique
- Invitation cards
- Recycled invitation cards
- Making a 3D map
- Teen card with insert
- Scrap card technique
- Easter card
- A very scrap photo album
- Beaded decor card
- Scrap Cat page


Trendy leather watches

Watch with double or triple leather strap decorated with charms, unique to personalize!
Watch with double or triple leather strap decorated with charms, unique to personalize!
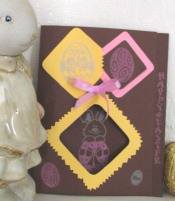
 Festive card: "Happy Easter!
Here's a step-by-step guide to making an Easter-themed card using Glue dots® Magic Motifs .
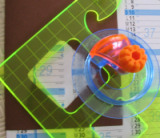
| These Magic Motifs are a quick and fun way of decorating, where you choose the colors and materials that will cover the self-adhesive designs: "magic" is the word that spontaneously comes to mind when you discover the motif adorned with the chosen color and material! It's an activity that immediately appeals to children, but also allows moms to create beautiful decorations. Window cutting with the Shape Cutter and the template board is child's play. For Easter, we've chosen colors that are a little offbeat: soft colors indeed, but combined with a color card... chocolate! |
 |
Necessary materials:
|
Tools used:
|
 |
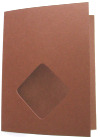
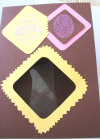
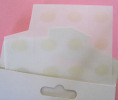
Step 1 Cut a card with the cutter and use the cutter to mark the fold. |
| The bottom of the card protrudes by about 1 cm (this will allow you to place a "Happy easter"). Cut a window in the card cover (a rounded square cut with the "Shape cutter"). |
| Step 2 |
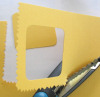
| Cut this same shape in the straw-yellow sheet | |
| Keep the removed part and go around this shape with the serrated scissors: glue this hollowed-out square to the card window to underline it. Cut this same square from a pink sheet, and a smaller, rounded square from the brown sheet. |
|


|

|
|
 |
Step 3 Using this technique, place a blue velvet Egg motif on the yellow mini-card, a different pink velvet Egg motif on the brown mini-card, itself placed on a pink mini-card, and a "Happy easter" text motif on the right-hand edge of the pink velvet card | .
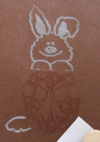
| Step 4 |
|
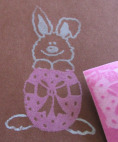
A "Rabbit with egg" motif is glued to the inside of the card so that it can be seen through the cover window. Originality: the rabbit is decorated with blue velvet and the egg with pink velvet! Simply place the Flock sheet precisely over the motif to be decorated. |
 |
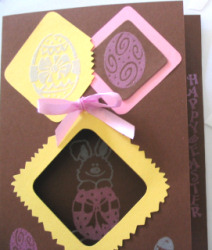 |
Step 5 Finishing touches... A small egg is placed on either side of the window. Then, to add relief and a touch of pink, a small satin bow is glued to the center of the card using a Glue Dots adhesive foam square. |
 |
[All our Easter crafts] [Decorating an Easter casserole] [Easter coloring pages]