
Scrapbooking: templates, examples and a little technique
- Scrapbooking vocabulary
- Embossing technique
- Invitation cards
- Recycled invitation cards
- Making a 3D map
- Teen card with insert
- Scrap card technique
- Easter card
- A very scrap photo album
- Beaded decor card
- Scrap Cat page

Napkins card with 3d relief effect
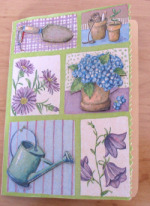
Here is a step-by-step guide on how to create a napkin card or invitation card with a 3d relief effect on several card motifs, using Odif 202 aerosol varnish-glue, which is particularly well-suited to this activity.
Materialsrequired :
|
|
 |
Step 1 Start by cutting out a quarter of the napkin and splitting it: keep only the top layer. |
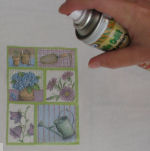 |
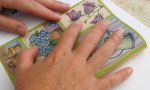
Step 2 Place the napkin right-side-up on a clean cardboard surface. |
| Spray the Varnish Glue Spray about 20 cm away, i.e. on the back of the napkin. Wait 1 min for the spray to develop its adhesive power. |
|
 |
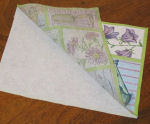
Step 3 Place the napkin on a sheet of cardboard of the same height as the napkin and twice the width |
| Place the napkin on the right-hand side so that the napkin is on the card cover. |
| If the napkin is incorrectly positioned, you can easily peel it off and start again: this is theadvantage of Spray Varnish. Using a clean cloth, dab the surface to remove any creases and ensure good adhesion. | |
 |
Step 4 Cut the top and bottom edges of the card with scissors (or a cutter if you have one). |
 |
Step 5 |
| the card in half across its width. |
 |
Step 6 Cut, ideally with notched scissors, the right edge of the card cover so as to reveal the inside of the card |
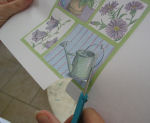 |
Step 7 Glue the top layer of a quarter napkin (identical to the one used previously) onto a piece of card stock, as in steps 1 to 3. Then carefully cut out several motifs from the napkin (it's all the easier if the napkin is glued onto a rigid sheet), here, the watering can, the flower pot, the little shovel.... |
 |
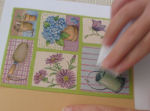
Step 8 On the back of each motif, stick a small 3D adhesive square. Then place each motif exactly over the corresponding motif on the card: the relief effect is created. |