Eglantine, Easter casserole
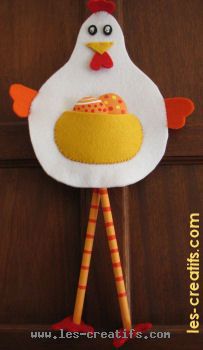
Eglantine, coquette cocotte de Pâques, a tenderly amusing Easter decoration in natural materials, to be made at home.
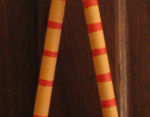
The originality lies, of course, in the wooden spoons, which serve both as warmly incubated eggs and as long legs with striped socks.
Material
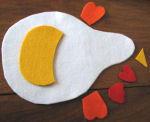
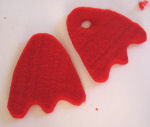
- thick felt (5mm): white (28x20 cm - like an A4 sheet), pieces in yellow, orange, red and black
- ribbon to hang Eglantine (here in orange)
- 2 round or oval wooden spoons, 30 cm
- a little yellow, red and white acrylic paint
- large and fine brushes
- orange and white thread - needle
- universal glue
Step 1
Step 2
Step 3
Step 4
Step 4
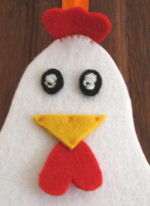
Sew together the tip of the beak and the top of the crop: this places the beak in relief, then, still using a cross, attach the other 2 corners of the beak.
Sew the crest. If necessary, add a ribbon (orange here) to hang Eglantine.
Attach the black felt eyes by sewing on the white thread using the throw-stitch embroidery technique. The idea is to draw in white, leaving a black circle on the side to fix the expression of the eyes.
Step 5
Step 6
Step 8
All that's left is to arrange the Eglantine's eggs and legs (crossed or parallel legs...) and hang it up.
Eager toshare? Publish your creative projects !
You're going to make an Eglantine? Send us a photo and your comments...
The best reviews on this card :
par rapsinblue le 17/03/2008 Eglantine, la poule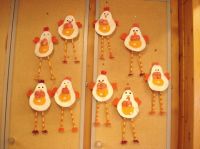 Bricolage de Pâques très chouette. Bricolage de Pâques très chouette.
Nous avons modifié un peu les matériaux utilisés, car le prix de revient était trop élevé pour l'école. Les enfants ont eu beaucoup de plaisir. Découpage de la feutrine un peu difficile pour les petits, nous avons dû les prendre individuellement. Le résultat est super ! | |
Par Rémi le 08/04/2009 Ma poule Eglantine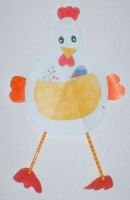 Avec maman pendant les vacances de Pâques nous avons fabriqué Eglantine la poule mais nous n'avons utilisé que du papier que nous avons colorié, les pattes sont des pailles de couleur avec des traits au marqueur!! On a adoré ce bricolage car cette année la maitresse ne nous a rien fait faire, dommage !!! Avec maman pendant les vacances de Pâques nous avons fabriqué Eglantine la poule mais nous n'avons utilisé que du papier que nous avons colorié, les pattes sont des pailles de couleur avec des traits au marqueur!! On a adoré ce bricolage car cette année la maitresse ne nous a rien fait faire, dommage !!!
Rémi, 8 ans | |
