Fairy dress for Barbie
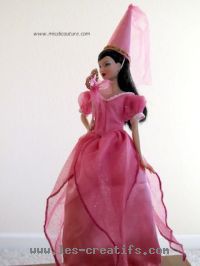
Here's how to make a steamy fairy dress for a Barbie doll, with just a little fabric, tulle and lining... With the help of essential fairy accessories (hat and wand), this beautiful princess dress becomes the dress of a unique fairy... And the world of enchantment opens up to little girls' imaginations!
Fairy dress topmaterial:
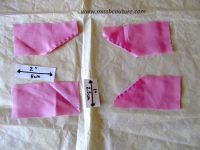
- 4 rectangles of fabric: 4.5cm x 9cm (1 ¾ " x 3 ½")
- Tulle sleeves: 2 rectangles 15cm x 4cm (6" x 1 ½")
- Tulle to cover top 4 rectangles: 4.5cm x 9cm (1 ¾ " x 3 ½")
- 2 Ribbons for sleeves 7cm (2 ¾")
- 2 snaps.
Materialfor bottom of fairy dress
- Dress lining 16cm x 47cm (6 ½" x 18 ½")
- Top fabric 37cm x 20cm (14" x 8")
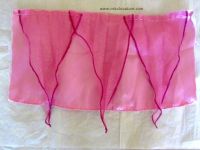
- Tulle 3 triangles : 24cm x 24cm x 13cm (9 ½" x 9 ½" x 5")
Preparing the top of the dress step 1
Preparing the top of the dress step 2
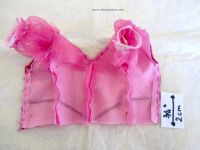
- Sew tulle to each top piece. Sew a hem in the back of the dress at the same time. And for the front, simply sew around the neckline.
- Sew the two front pieces together in the middle to form the neckline. Try on the doll for a perfect neckline.
- Sew the front and back pieces together at the shoulders.
Sewing the sleeves on the top
Top stitching finishing step 1
Sewing top finishing step 2 sleeves
- Sew the ribbon to the sleeve ends, pleating the fabric.
Preparing the seam line for the top of the dress
Preparing the bottom of the dress
Dress top and bottom assembly
Dress finishing
- Sew the dress on the back. Leave a space at the top 1.5cm ( ½")and sew a hem, so the doll can pass through the dress.
- Sew the snaps on the back.
- Sew the decoration on the front (I used ribbon).
Just to conclude: don't miss the steps to make the fairy hat and its wand.
Your little fairy will be able to go and cast (nice) spells!
Fiche créative proposée par


