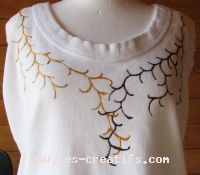
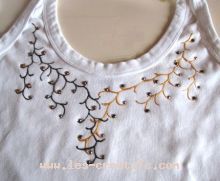
Paint & rhinestones tutorial: personalize a T-shirt
Create your own personalized T-shirt!
Supplies
- a white top: in this case a choker, but a tank top or simple tee-shirt can also work
- 2 bottles of Diam's 3D paint: gold and chocolate
- Swarovski Hotfix crystal rhinestones: 12 SS20 Topaz rhinestones, 12 SS20 Jet nut rhinestones, 18 SS16 Crystal Copper rhinestones ("hotfix" means they are pre-glued and heat-set).
Painting stage
The top must first be washed to remove any primer (which may prevent the paint from setting properly), then ironed.
Start by painting the branches in one color on one side of the top: directly with the nozzle, pressing down regularly. Diam's bottles are rather supple, which is nice when the work takes a bit longer...
Each time you're about to draw with the nozzle, start on a sheet of paper, tipping the bottle vertically to avoid air bubbles. Otherwise, when you press down on the bottle, you run the risk of an air bubble escaping, and with it fine droplets that could stain your work.
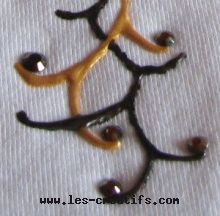
The pattern is simple to create:
1. draw a curve on the bottle
2. start from the middle of this curve and draw a curve symmetrically reversed to the first
3. start from the middle of the previous curve etc.
In 2 or 3 places, to fill the space to be painted, two branches detach from the mother branch.
Strass stage
The rhinestones are arranged harmoniously in the curves: Jet nut 2x rhinestones (chocolate-metallic color) against the gold-colored curls, Topaz rhinestones against the chocolate-painted curls.
Then the smaller Crystal Copper rhinestones are scattered over the two branches.
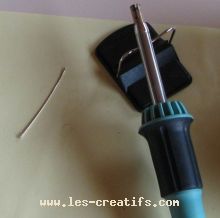
The rhinestones are attached to the fabric using the electric applicator.
Install the right tip for SS20 rhinestones (the size is indicated on the tip itself).
Heat for a few minutes.
Place the hot tip against the 1st rhinestone to be glued, tilt the applicator to place the rhinestone horizontally (this allows you to see the glue boiling, a few seconds are enough when the applicator is hot), slowly tilt the applicator to place the rhinestone in its slot. Press down so that the glue adheres to the fabric, then remove the device.
In the absence of an electric applicator, rhinestones can be fixed with an iron, but this is more random. Once the rhinestones have been placed in the right places, you need to protect the backing with a cloth and iron over them with the iron in cotton position for a few dozen seconds per rhinestone zone. But if rhinestones move under the fabric, they'll be stuck in the wrong place.
To find out all you need to know, consult our sheet on different crystal rhinestones and see the different electric rhinestone applicators.
Let your top dry flat and wait 48 to 72 hours. You can then machine-wash it (up to 40°) without fabric softener, and iron it on the reverse side.

