
Mosaics: techniques for starting mosaic creations
- Step-by-step mosaic pattern
- Occitan mosaic cross
- Micro-mosaic ball candle

Mosaic: a model for beginners
|
This model is made with D'clic Mosaïc mosaic manufactured by GAIA LOISISRS, whose special feature is the pre-cut tesserae. The rectangles supplied can simply be broken by hand to obtain the pre-cut geometric shapes. Very easy to use, ideal for children, the elderly or anyone for whom creative leisure doesn't have to rhyme with feats of strength! | 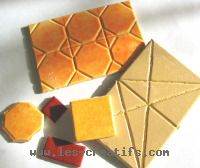 |
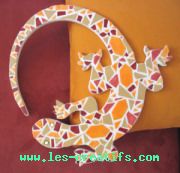 |
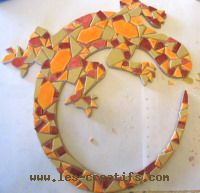
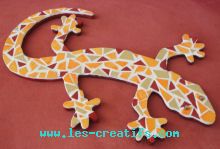
Forthe chosen model, the lizard with its rounded and twisted shapes, other shapes than geometric ones need to be obtained. A small hacksaw blade or even a school chisel is all that's needed to make a mark on the tile, then with a simple "click", the desired shape is obtained. To smooth the edges, coarse-grained sandpaper works well, as does a metal file. A simple piece of equipment that can be used to introduce children to mosaics. |
| Good to know! When using traditional tesserae, you'll need a good pair of cutting pliers, and even with a multiplier effect, you'll need to use a lot of force to get a clean cut, and a little practice to achieve the desired shape. What's more, depending on the material used, splinters can splatter the work table. |
The "lizard" support supplied is made of medium wood, so all you need is a brush to apply the liquid glue directly onto the support.
completion time (for a beginner...) : 5 h.
Step
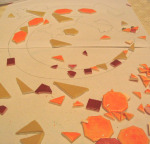
| 1: transfer the design For this particular shape, first transfer the outline onto a sheet of paper. Step2: cut the tesserae Simply cut the Mosaclic with your hands and position the resulting shapes on the sheet of paper, alternating colors. To obtain a small, precise shape, use pliers and then a metal file to smooth the edges. | |
 | |
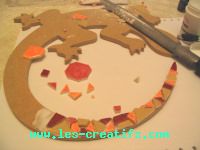
| 3: gluing the mosaic "I chose to place 3 identical shapes at regular intervals on the lizard's back.These shapes were just "clicked" into the mosaic rectangle provided, hence their geometric regularity." With a brush, glue a small part of the support (be careful, the glue provided is quick-drying, it's handy for linking, but you have to glue as you go along). Move the tesserae one by one from the sheet onto the glued support. | |
 | |
| 4: drying Once the entire surface has been covered, leave to dry. |
 |
| 5: the joint Prepare the joint by mixing powder and water to obtain a homogeneous, thin paste. Caution: the joint contains cement, so protect your hands and eyes. Place the joint by simply "squishing" it onto the tesserae with fingers protected by plastic gloves, filling all the gaps. | 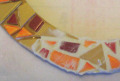 |
| 6: cleaning Then move on to the last traditional phase of tiling: cleaning. Use a slightly damp sponge to remove the grout from the surface of the tiles, smoothing out any gaps between the tesserae at the same time. Shine with absorbent paper. Essential for this lizard model: eyes! Simply glued on with jewel glue, Swarovski SS34 Jonquil rhinestones give it a luminous look. | 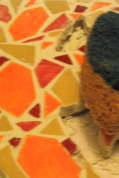 |
| Step 7: finishing For a beautiful finish to your work and to unify the edges of the medium wood, joint and tesserae, paint the edges with acrylic paint, here in white. |
 |
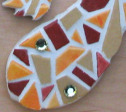
Toaccompany the lizard, a salamander is born: its reddish hue is enhanced by the garnet-red painted edges. |